
Did you ever make jelly candles as a kid? I did! And then we shoved our fingers in them when they were all set-up and made our mom so mad – haha! This Citronella Jelly Candle DIY is so simple, but will keep the bugs away in style the next time you want to sit outside!

This post may contain affiliate links. See our full disclosure policy HERE.
This Citronella Jelly Candle is seriously so simple. You only need a few supplies, and then it’s basically melt and pour! When I was refreshing my memory on how to make these, I looked up some other tutorials and could never find clear language or links to tell me exactly what I needed to buy, so I made THIS handy Amazon list so you can go just add all these items to your cart and be done with it. No searching involved!
WANT TO MAKE SOME MORE CANDLES? TRY THESE DIY RECYCLED CANDLES!
I used Citronella essential oil for this because it’s a natural bug repellent. So on top of this being super cute for Patriotic holidays or decor, it’s also useful by keeping the bugs away. You can add a different oil, or candle fragrance, or leave it out all together of you want that as well.
Citronella Jelly Candle

You will need:
Glass jars (I used jelly mason jars I found at Dollar General)
Candle wicks
Gel candle wax (this was the one ingredient that I hoped I was buying correctly, because no one would name a product specifically)
Candle dye (don’t use regular food coloring, it doesn’t work)
Citronella essential oil (I use Young Living brand, but you can snag another brand I linked to)
CLICK HERE TO LINK TO ALL THE SUPPLIES IN ONE PLACE!
Making Your Citronella Jelly Candle
The first thing you will need to do, once you get your supplies, is to scoop out some of the jelly wax (this is much more difficult than it looks) and put it straight into a pot on the stove and melt it down. Use medium heat to avoid popping (ask me how I know). Once it’s melted completely, then you’re ready to add your colorant and essential oils.
I added about 10 drops of red to the red layer, and the same amount of blue for the blue layer. The good thing about this craft is that you don’t need to measure the exact amount for each color, and it can vary. I love forgiving DIY projects like this! Makes them much more enjoyable when you don’t have to stress about being perfect.
Use a drop of hot glue to attach your wick to the bottom of the jar. Then wrap your wick around a pencil or bamboo skewer stick and balance it on top of your jar to keep the wick in place. Use a funnel to pour the jelly wax from your pot into your candle jar.
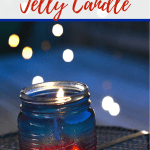
I did my red layer first, then clear, then blue. You WILL need to clean out your pot and funnel after the red layer before moving on to the clear and blue layers. Use a silicone spatula for easiest clean up.
You will need to cool each layer before adding the next layer to make sure the colors stay separate. I stuck mine in the freezer while I was cleaning up and melting the next batch of jelly wax. This worked out pretty evenly. I added 8 drops of citronella essential oil to each layer. This gave the candle a strong scent without it being overwhelming, so it repels well.
Let them cool completely in the freezer once you’re finished with all three layers. Once they’ve cooled, trim the wick to about half an inch above the wax top. Store in a cool, dry place for best results.
Now you can enjoy the outdoors without so many pesky bugs, and you can do it in style! These turn out looking so pretty. I love how you can see straight through the candle wax! It’s so simple, but so pretty! Enjoy making!