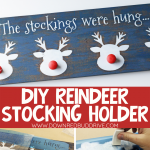


Make this adorable Reindeer Stocking Holder DIY with just a few materials and a free SVG file! It’s the perfect way to hang stockings this year!

This post may contain affiliate links. See my full disclosure policy HERE.
I’ve always wanted a way to display stockings, but just never can find what I want. I finally found a design I liked and decided to make my own!
This adorable stocking holder DIY is really simple to make. If you have a vinyl cutting machine, or have a friend who does, I even included the free SVG files for you to use!
If you’re just here for the free printables, and don’t want to read the tips on printing and instructions on how to put these together below, then you can get those HERE.
How do you make this Reindeer Stocking Holder DIY?
Step 1: Gather your supplies.
You will need:
- Small Wooden Cabinet Pulls (I used four)
- Wood Board (mine was pine and was ?x?)
- Chalk Paint ( I used a dark blue from American Paint Company)
- Red Acrylic Paint
- White Acrylic Paint
- Vinyl
- Vinyl Cutting Machine like a Silhouette or Cricut
- Sponge (I used a makeup applicator wedge)
- Paintbrush
- Clear Antiquing Wax
- Free SVG Reindeer File
- Screwdriver
- Drill
- Wall Hanging Bracket
Step 2: Paint the knobs and base board.

I painted my knobs red with red acrylic paint. I didn’t want to keep the knobs plain wood, so I painted them red for a nod at Rudolph the red-nosed reindeer!
Then I painted my board a dark blue using American Paint Company chalk paint. I purposely left my paint a bit wet on the board so when I put down the vinyl sticker, it would pull up some of the paint when I pulled it off, giving it an aged look.
Let them dry while you work on the next steps.
Step 2: Print off the SVG files on vinyl.

While you’re waiting on the paint to dry, you can print off the SVG files onto vinyl. Make sure your stickers are ready and level.

I used a makeup sponge to sponge on the paint. Don’t use too much paint, because a little goes a long way.
Step 4: Add the words.

I did my reindeer first, and my words second. I used white acrylic paint to sponge on the reindeer and lettering.
Step 5: Attach the noses on to your Reindeer Stocking Holder.

Drill a small hole through the board in the center of each reindeer’s face for the knobs to screw onto.
Use a screwdriver and fasten the knobs as your stocking holders. Make sure they’re good and tight!
Once everything is attached, you can use clear antiquing wax to seal the paint to keep it from scratching as easily over the years. Just brush a thin coat on and let it dry.

When your Reindeer Stocking Holder is finished, this is what it will look like! I let mine dry overnight to let the paint and wax cure before hanging my stockings on it.
I added a hanger to the back of mine so I could easily hang it from the wall next to my Christmas tree. It’s such a simple project, but turns out so cute!
Get the free SVG files here!

Want more Christmas DIY gift ideas?
-


CLICK HERE -

CLICK HERE -

CLICK HERE
- Button Trees Christmas Decor – This cute little Christmas craft is super fun and super unique!
- Waterless Snow Globe – This DIY Christmas craft is one of my favorite pieces of holiday decor!
- Grinch Trees Christmas Decor – Bring the look and feel of a classic Christmas movie into your home!
Whether you use this Reindeer Stocking Holder DIY yourself, give it to someone else, or make several to sell you’re going to love how easy this craft is! Happy crafting!