DIY Money Cake Tutorial

Make your own DIY Money Cake and make giving money personal and fun! Learn how to make a money cake and your gift will be memorable and exciting!


This post may contain affiliate links. See our full disclosure policy HERE.
Giving money as a gift normally makes you feel like you’re taking the easy, impersonal road. However, presentation is key! This DIY Money Cake makes giving money awesome and exciting! They’re easy to make, and you can adapt them to any holiday or event which makes them versatile and the perfect gift for any occasion!
LIKE DIY GIFT IDEAS? CHECK OUT HOW TO MAKE A DIY CANDY BOUQUET!
Below I will give examples on how to make this for a for a birthday gift, but you could easily adapt it to be a graduation gift (click here for the tutorial), wedding gift, a retirement gift, etc etc. Not only do I give you examples on how to make an awesome grad and birthday DIY Money Cake, BUT I designed some printables to make your DIY Money Cake look awesome that I’m giving you for FREE! Click here to get the free printables for yours.
If you want to make a graduation money cake specifically, check out this tutorial with custom made printables to make one HERE!
How to make a Money Cake
You will need:
10″ cardboard cake circles
White poster board
7-10 individually wrapped Reese’s candy
Garland or ribbon
18″ of ribbon
Free birthday printables (if it’s for a birthday)
Scotch tape
Glue Dots
(20) $1 bills
Hot glue gun
Step 1: Cut the cardboard circles.
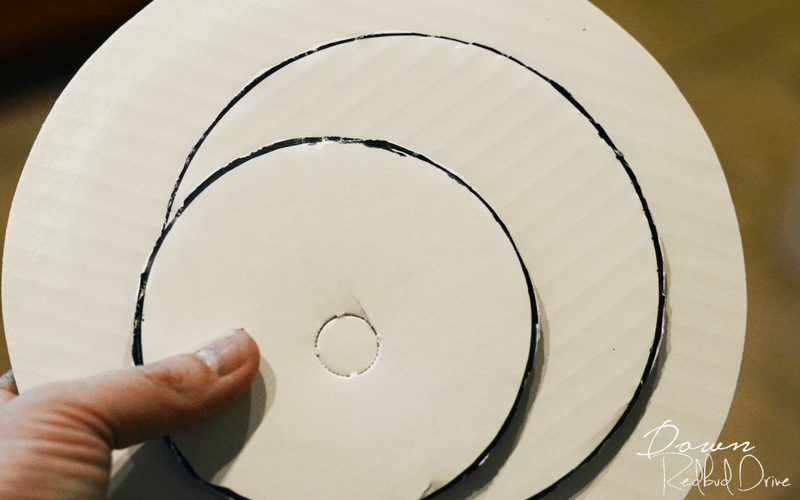

I bought a pack of 10″ cake circles from the cake decor section of my Walmart. You can buy them HERE from Amazon, or you can get them at your Walmart, OR you could just cut your own circles from a cardboard box you have on hand. I cut a smaller circle at about 8″, and then a smallest circle at around 6″ for my cake. So you should have a 6″, and 8″ and a 10″ to make your cake. If you wanted to make it even taller, you can add a second 10″ and do another big layer on the bottom.
Step 2: Make the money cake base.
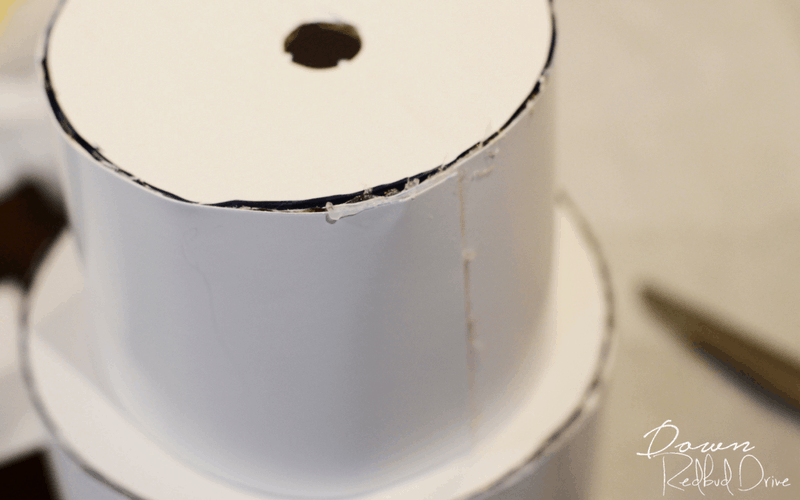

Next you will need to cut two long strips of poster board to make the edges of your cake, so you can attach the money and candy. I made mine 3″-4″ wide. 4″ will give you enough room for just the money, and 4″ will give you enough room for the money and garland around the bottom as well.
Hot glue the cardboard strips around the outside of the circles. Then stack the tiers and glue them down.
Step 3: Attach the candy to the money cake.
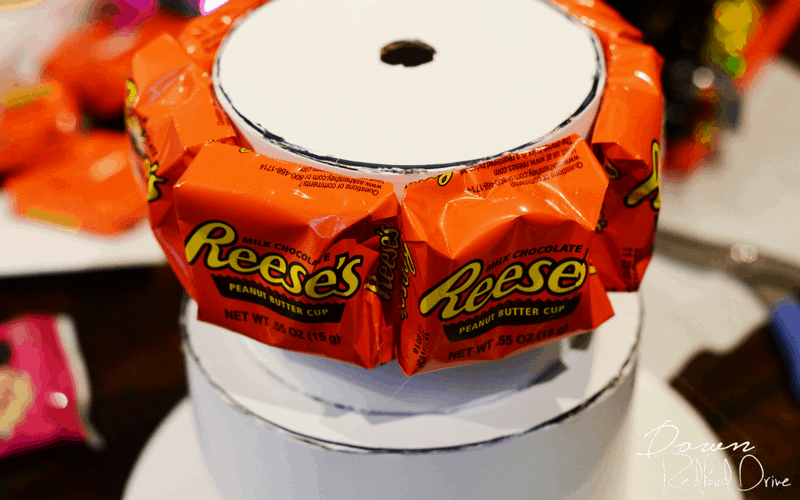

Next, use glue dots, or hot glue to attach your candy around the top layer of the cake. I used Reese’s and it fit 7 of them perfectly. You could also use any kind of fun size candy or candy bar and it should fit just fine. Don’t leave space between them for a more finished look.
Step 4: Roll the cash.
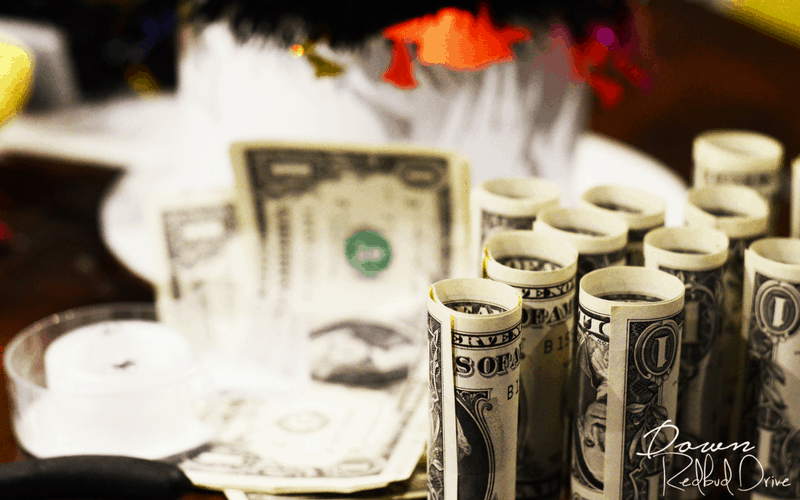

Next, you will need to spend the rest of your life, I mean the next ten minutes or so, rolling dollar bills and then using scotch tape to keep them rolled. If you roll them tightly, you’re gonna need a lot of money. I rolled them about big enough to fit on my thumb and $20 was just perfect. DO NOT USE HOT GLUE to attach the dollar bills to the DIY Money Cake. Use glue dots, or use double sided scotch tape.
To make your cake look finished, like the one below, you have a few more steps you need to take. I use garland to fill in the gaps under the candy and the dollars. This not only fills in gaps, but makes it look more fun and exciting too! Leftover Christmas garland works great, or you can get some on Amazon HERE. You can hot glue the garland on, tape it, or simply tie it in a knot.
The printable birthday banner on the front has pre-marked slits on each side. Use a knife or a razor cutter to slice those slits, and then run a ribbon through them. Tie the ribbon on with a bow in the back. I like to put that over the candy section, but do what you feel looks best. Lastly, for the toppers you have some options. For the birthday option, I wrapped some garland around a cheap party hat and glued the hat to the top of the cake. Easy and adorable! Alternatively you could use more garland and candy or something similar, depending on the occasion you’re making the money cake for.
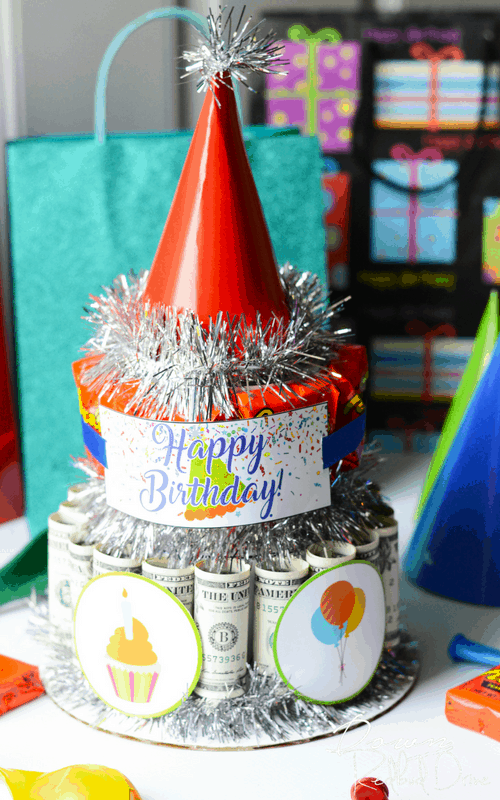

The birthday printable sheet also has some fun birthday accent circles that match the banner perfectly. Tape those onto the outside of the money to make it look more festive. So now money can be a fun and personal gift! What occasion will you make yours for? Tell me in the comments!


